 logo
logo


Captcha Settings
Captcha, or “are you human” verification, ensures that bots can’t attack your login page, providing additional protection with minimal impact on users.
To configure these features and make the most out of the plugin, you’ll need to access the WP Captcha PRO settings within your WordPress dashboard.
Here’s how to get there:
- Log in to your WordPress Dashboard: Enter your credentials to access the backend of your WordPress site.
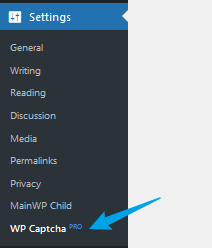
- Navigate to ‘Settings’: On the left-hand menu, locate and click on the ‘Settings’ option.
- Select ‘WP Captcha PRO’: Within the ‘Settings’ menu, you’ll find an option labeled ‘WP Captcha PRO.’ Click on this to access the plugin’s settings.
You are now in the WP Captcha PRO settings area, where you can configure Captcha types, display options, and more. The following sections of this guide will walk you through each setting and provide instructions on how to set up the plugin to meet your specific needs.
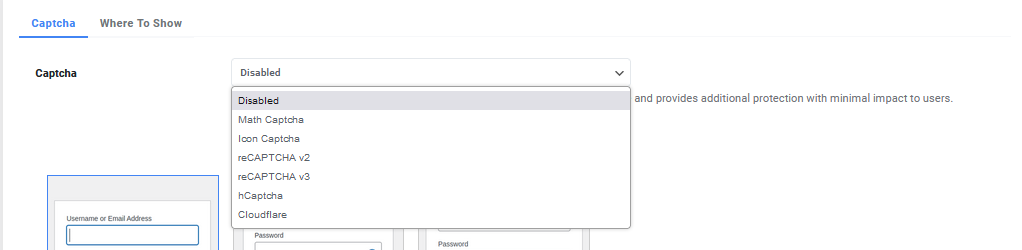
Captcha Types
Choose from various Captcha types to match your site’s security needs:
- Captcha Disabled: No Additional Security
- Built-in Captcha: Medium Security, No API keys, GDPR Compatible
- Icon Captcha: Medium Security, No API keys, GDPR Compatible
- reCaptcha v2: High Security, Requires API Keys, Not GDPR Compatible
- reCaptcha v3: High Security, Requires API Keys, Not GDPR Compatible
- hCaptcha: High Security, Requires API Keys, GDPR Compatible (Best Choice)
- Cloudflare Turnstile: High Security, Requires API Keys, Not explicitly GDPR Compatible (Best Choice)
How to Set Up Captcha:
- Navigate to the Captcha Section: In your WordPress dashboard, go to WP Captcha settings and select the “Captcha” sub-section.
- Choose a Captcha Type: Select the Captcha that best fits your security preferences.
- Enter API Keys if Required: For Captchas requiring API keys, enter the corresponding keys.
- Save the Changes: Click the “Save Changes” button to apply the configuration.
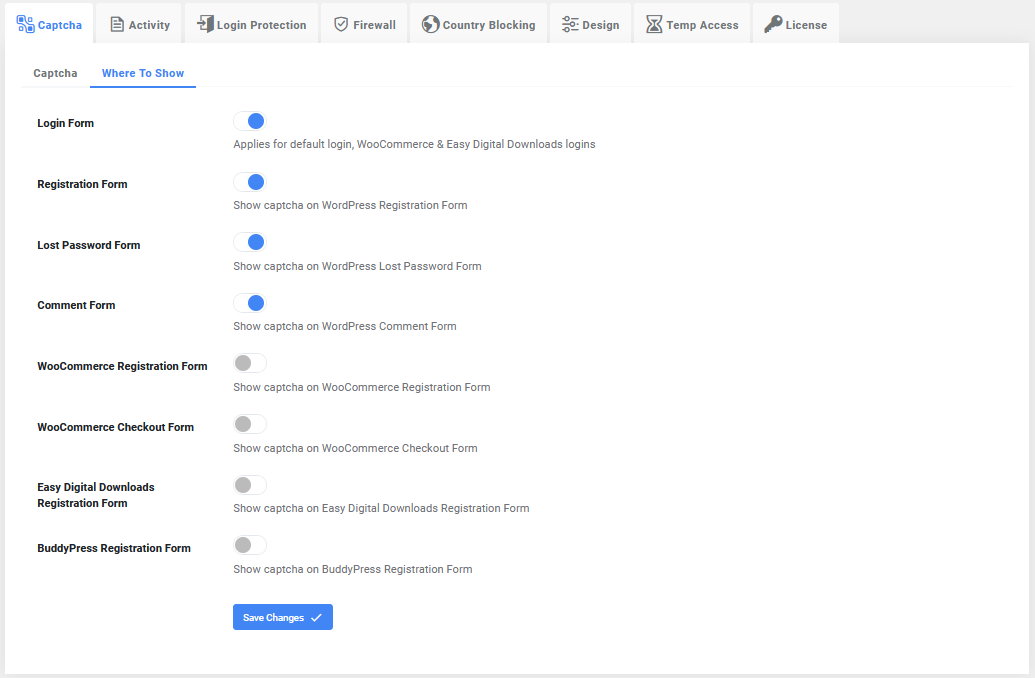
Where to Show Captcha
You can decide on specific forms where Captcha will be displayed:
- Login Form: Applies to default login, WooCommerce & Easy Digital Downloads logins
- Registration Form: Show Captcha on WordPress Registration Form
- Lost Password Form: Show Captcha on WordPress Lost Password Form
- Comment Form: Show Captcha on WordPress Comment Form
- WooCommerce Registration Form: Show Captcha on WooCommerce Registration Form
- WooCommerce Checkout Form: Show Captcha on WooCommerce Checkout Form
- Easy Digital Downloads Registration Form: Show Captcha on Easy Digital Downloads Registration Form
- BuddyPress Registration Form: Show Captcha on BuddyPress Registration Form
How to Configure Where to Show Captcha:
- Navigate to the “Where to Show” Section: In the WP Captcha settings, select the “Where to Show” sub-section.
- Select the Desired Forms: Check the boxes for the forms where you want to display Captcha.
- Save the Changes: Click the “Save Changes” button to update the settings.

Configuring WP Captcha provides a robust layer of security to your site. By understanding the different Captcha options and choosing where to display them, you can create a secure and user-friendly experience for your visitors.
For additional support or inquiries, please contact our support team at wpcaptcha@webfactoryltd.com.