logo
logo


Login Protection is a crucial feature of WP Captcha that provides security against unauthorized access and brute-force attacks. This section is divided into three sub-sections: Basic, Advanced, and Tools. Here’s a detailed breakdown of each, along with instructions on how to use them:
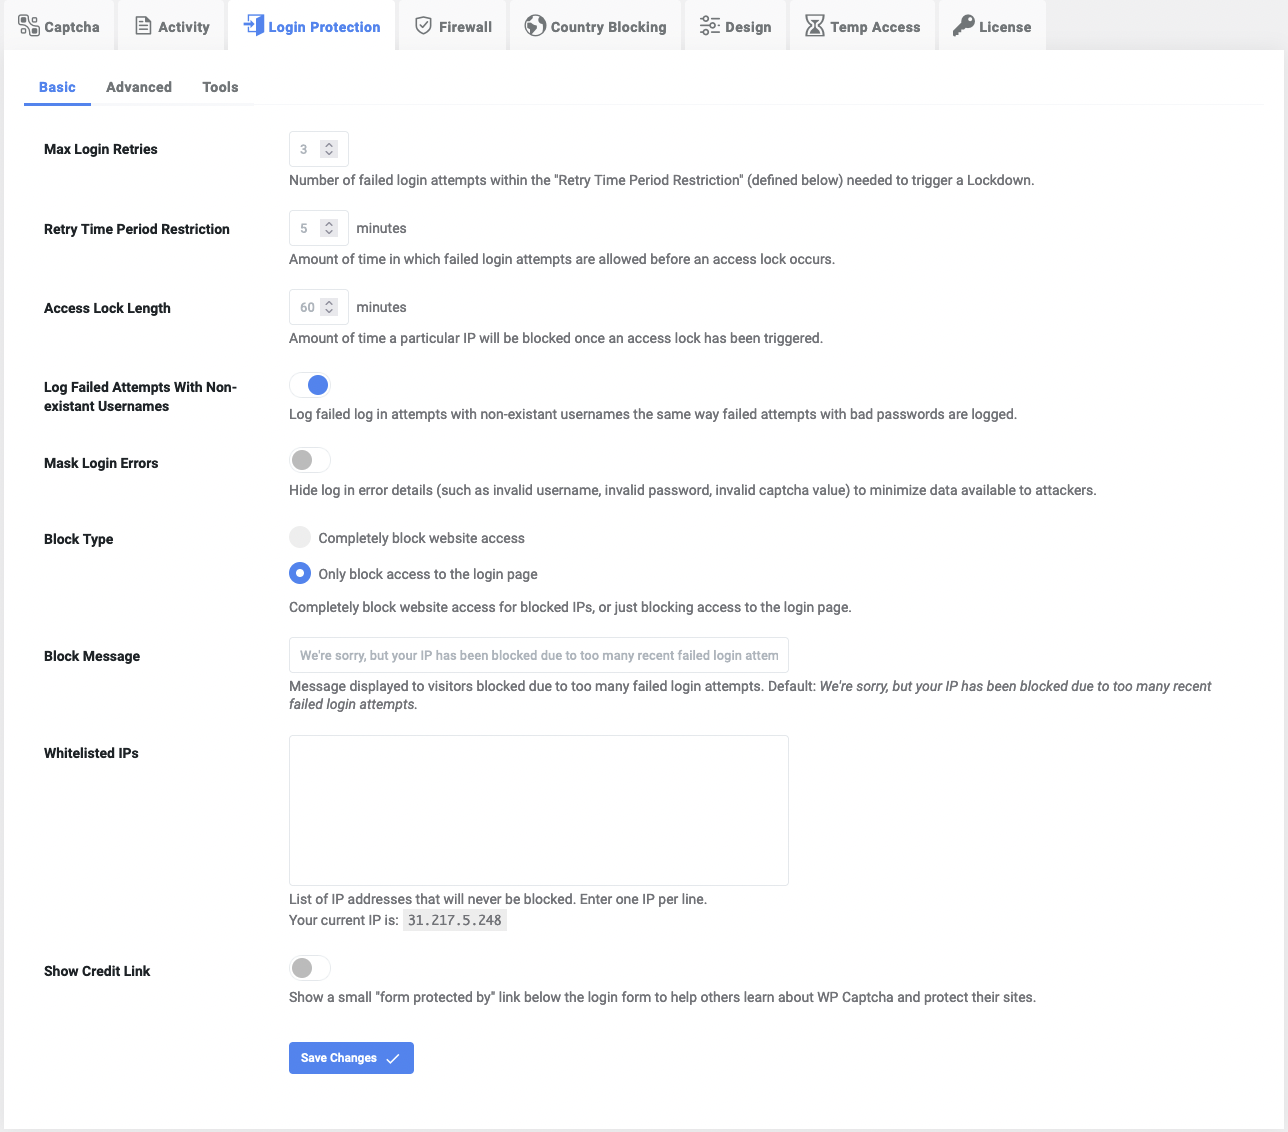
Basic Login Protection
How to Configure:
- Max Login Retries: Set the number of failed login attempts needed to trigger a lockdown.
- Retry Time Period Restriction: Define the time frame (in minutes) for failed login attempts before an access lock occurs.
- Access Lock Length: Determine the duration (in minutes) to block a specific IP once access is locked.
- Log Failed Attempts With Non-existent Usernames: Enable or disable logging for failed attempts with non-existent usernames.
- Mask Login Errors: Hide login error details to minimize information available to attackers.
- Block Type: Choose whether to block website access entirely or only block access to the login page.
- Block Message: Customize the message displayed to blocked visitors.
- Whitelisted IPs: List IP addresses that will never be blocked. Your current IP is displayed for reference.
- Show Credit Link: Optionally show a credit link below the login form to promote WP Captcha.
- Click “Save Changes”: After selecting your preferences, click the “Save Changes” button. The plugin is now configured.
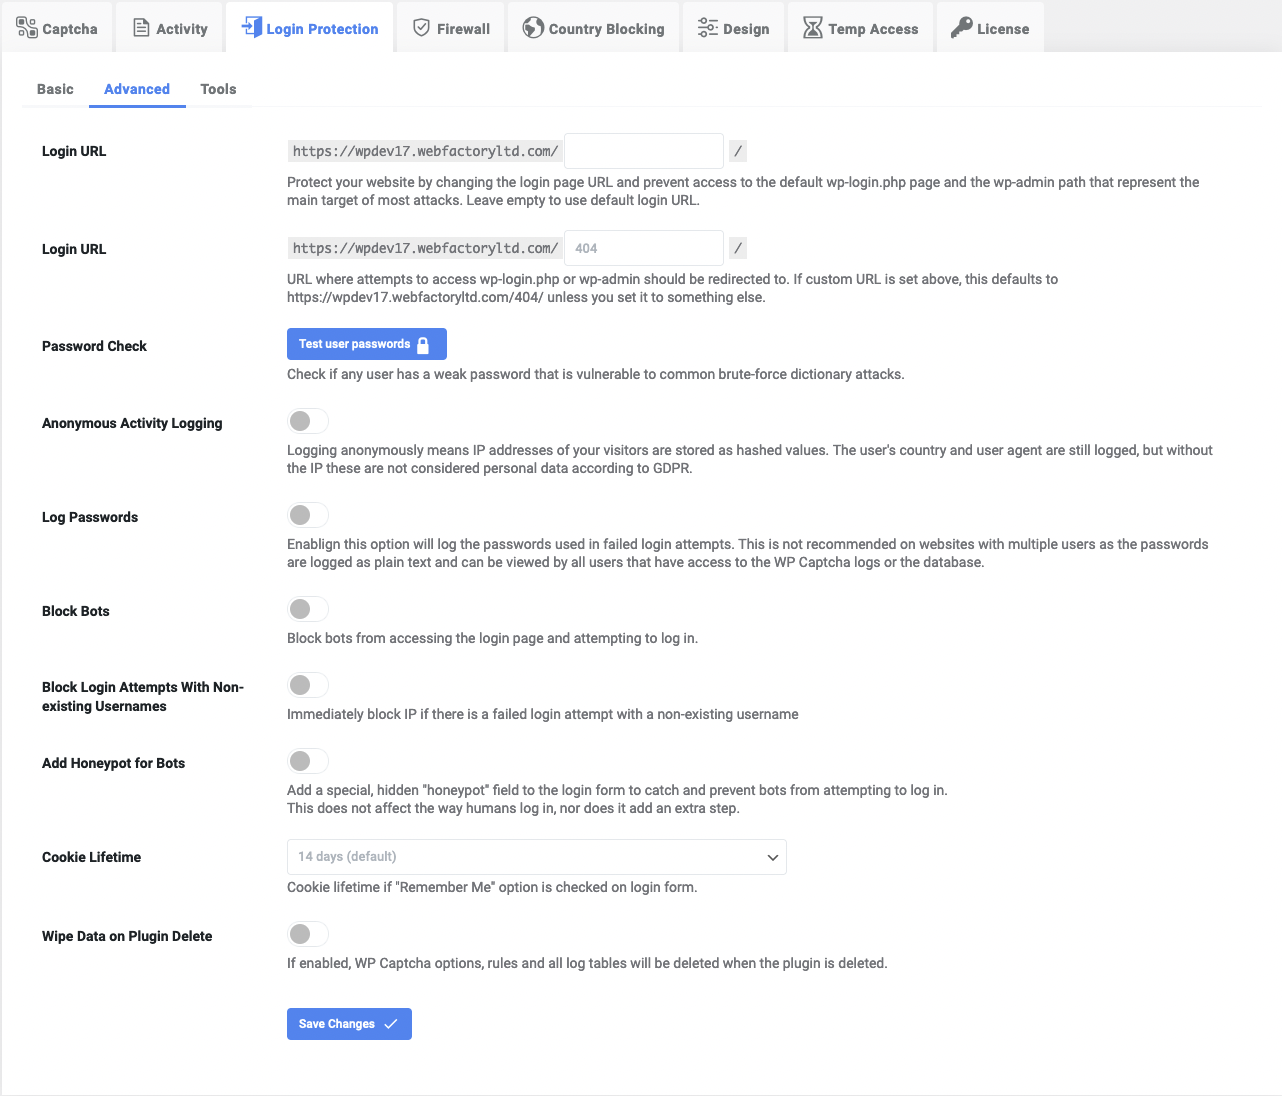
Advanced Login Protection
How to Configure:
- Login URL: Change the login page URL to protect against attacks on the default login page.
- Password Check: Enable checking for weak passwords that may be vulnerable to attacks.
- Anonymous Activity Logging: Log visitor details anonymously, in compliance with GDPR.
- Log Passwords: Enable or disable logging of passwords used in failed login attempts (use with caution).
- Block Bots: Prevent bots from accessing the login page.
- Block Login Attempts With Non-existing Usernames: Block IPs immediately if failed login attempts use non-existing usernames.
- Add Honeypot for Bots: Include a hidden field to catch and prevent bots from logging in.
- Cookie Lifetime: Set the cookie lifetime if the “Remember Me” option is checked on the login form.
- Wipe Data on Plugin Delete: Enable this to delete all WP Captcha data when the plugin is deleted.
- Click “Save Changes”: Once you’ve made your selections, click the “Save Changes” button. The plugin is now set up.
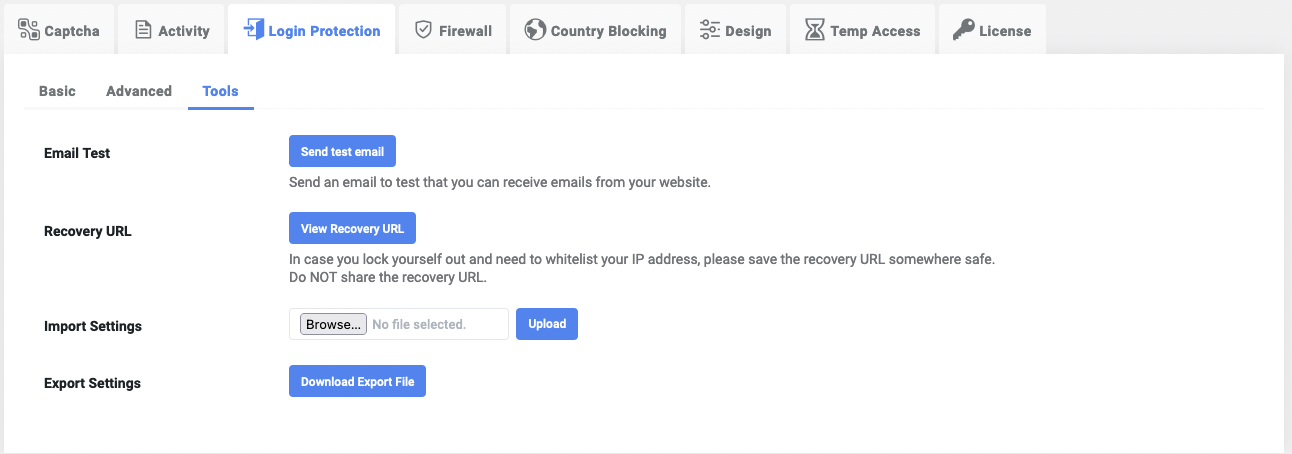
Tools
How to Utilize:
- Email Test: Send a test email to verify that you can receive emails from your website.
- Recovery URL: Save this URL in a safe place in case you lock yourself out and need to whitelist your IP.
- Import/Export Settings: Easily import or export WP Captcha settings.